Install Fooocus AI Image Generator on Windows 10 or 11
How to install Fooocus AI image generator on Windows.


I've been thoroughly running and testing Fooocus on my own hardware for about a week now. I wanted to share with you my settings, how to set it up and get it working. Take a look at these images I generated using Fooocus!


Looking for images like these? You can get them for free! Let me guide you on how to start with Fooocus and share the settings I use. You'll be amazed at how effortless it is!
Before installing Fooocus
Before we even begin, you must have an Nvidia graphics card with at least 4GB of VRAM and 8GB of system memory. Fooocus uses CUDA which is a proprietary to Nvidia GPUs.
CUDA GPUs are specialized for performing complex mathematical calculations at a very high speed. This capability makes them particularly effective for tasks that involve processing large amounts of data simultaneously, such as graphics rendering in video games, 3D modeling, scientific simulations, and machine learning. CUDA, standing for Compute Unified Device Architecture, is the programming model and software environment created by NVIDIA specifically to enable developers to use these GPUs more efficiently for these kinds of computationally intensive tasks.
I am running an Nvidia GTX 2080ti with 8GB of VRAM. I average around 18-20 seconds per image generation. This particular card has 544 tensor cores so I got lucky there!
Tensor cores in a GPU are specialized processing units designed for lightning-fast calculations involved in deep learning and artificial intelligence tasks. They excel at performing complex mathematical operations known as tensor operations, significantly speeding up tasks like neural network training and scientific simulations, thanks to their ability to handle these calculations more efficiently than regular GPU components.
Installing Fooocus on Windows 10/11
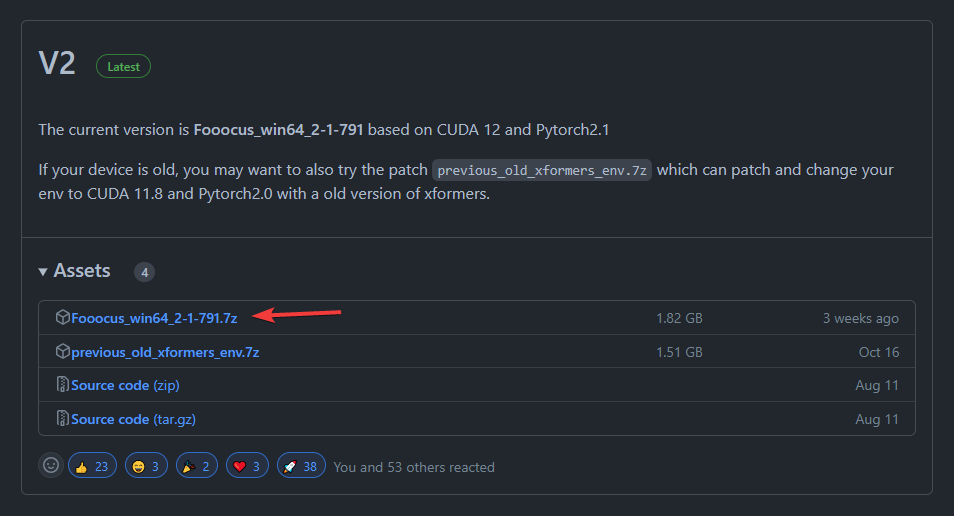
Head over to the Fooocus Github repository and download the latest release. Click the win64 link to begin the download. It's almost 2gb so it may take a minute depending on your connection speed.
Use 7zip or Winrar to unzip the file and extract it into a folder on your desktop.
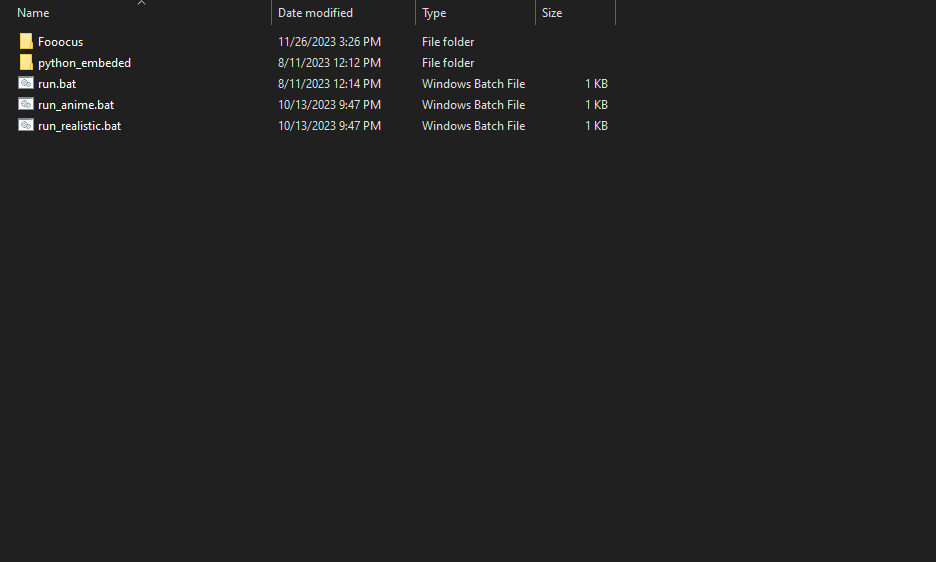
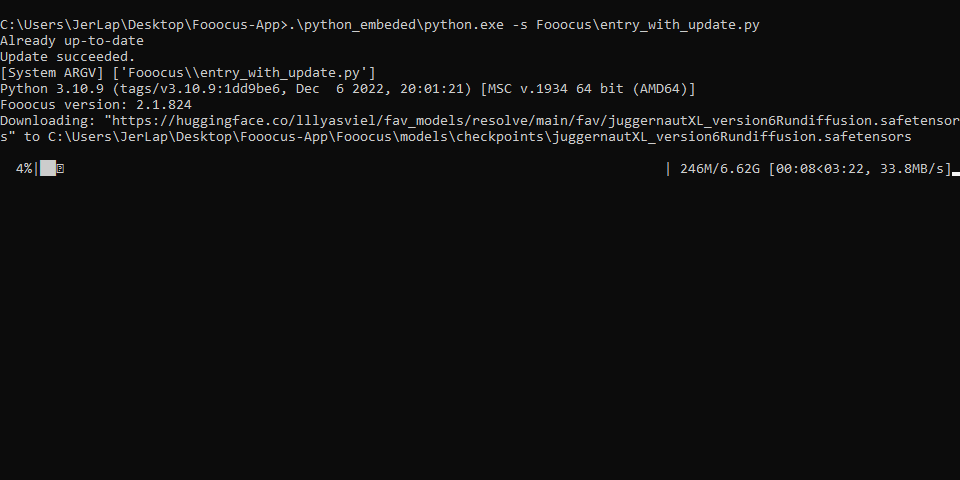
Double Click the run.bat file. This will download the juggernautXL model to your machine. It's about 6.6GB so it may take a few minutes. When it is complete, it will open Fooocus in your default browser.
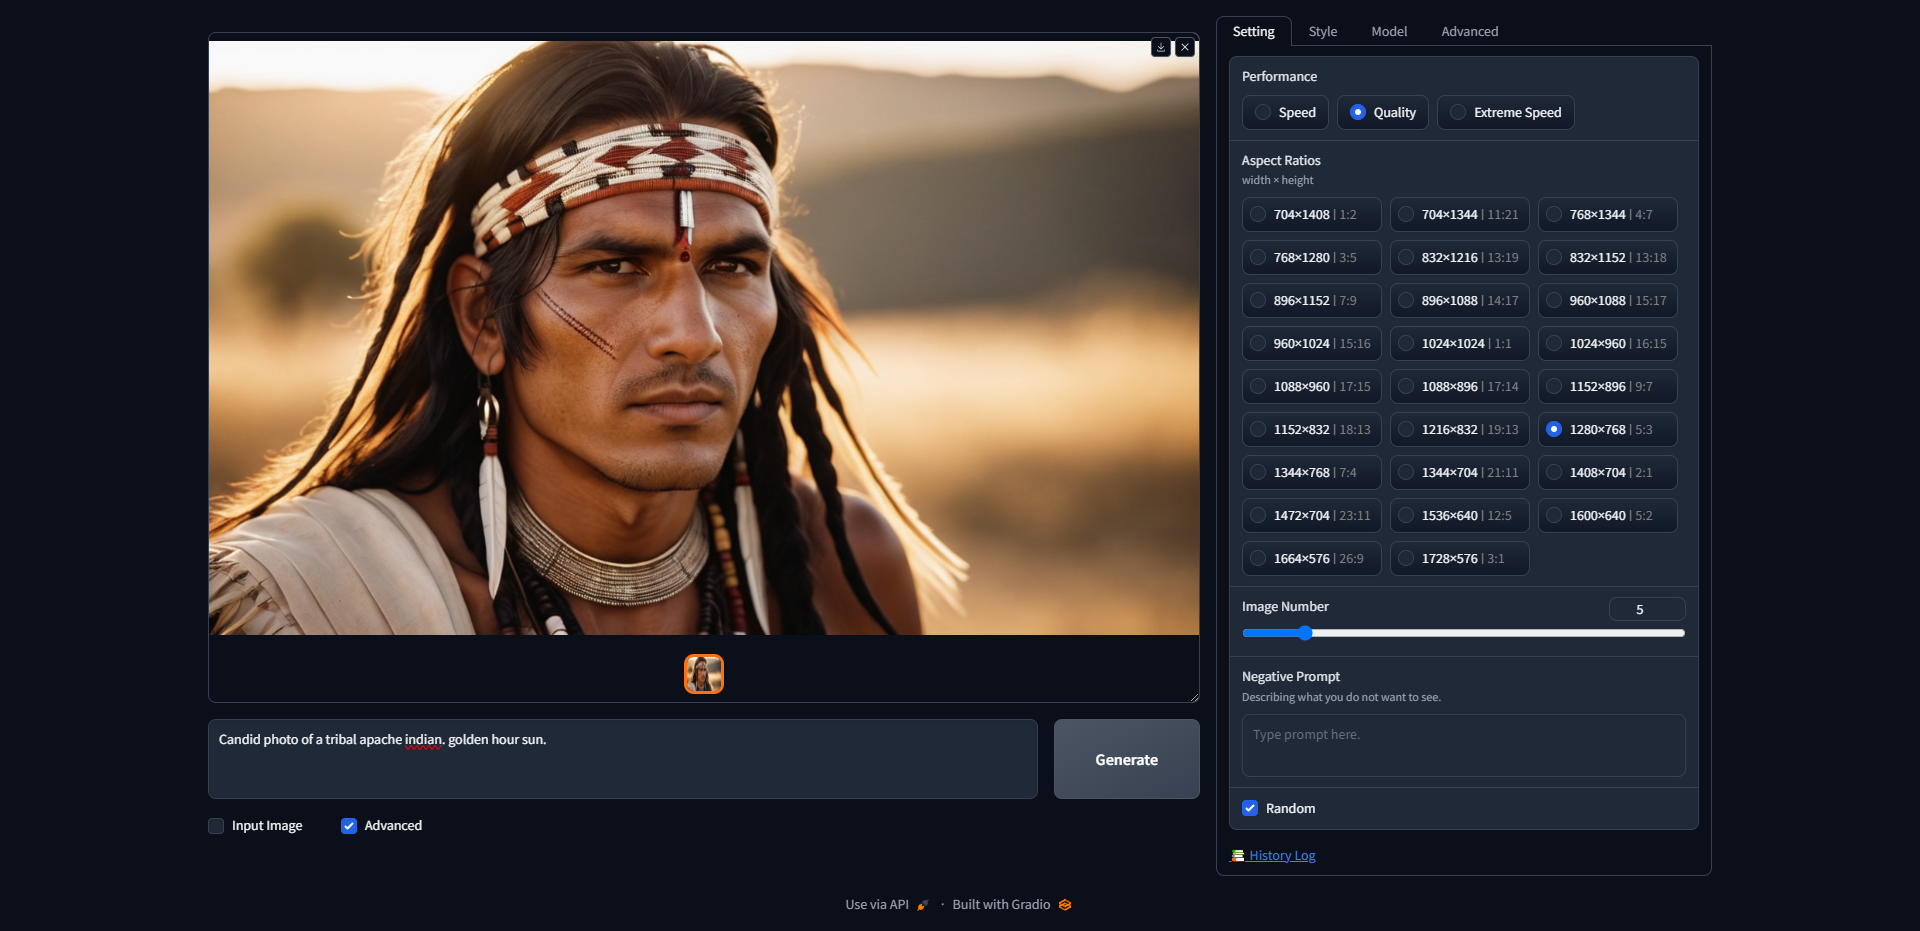
Tick the advanced box and change any settings you desire such as size and style. I wouldn't recommend messing with the model or advanced tabs until you become familiar with how the software works.

I like to choose "Quality" to get better quality images. It takes a bit longer to generate images but 20 seconds is not bad. And again, these results will vary depending on your GPU specs.
That's all there is to it! Take some time to explore and experiment on your own. Get familiar with the various styles and settings. I'm confident you'll be pleasantly surprised by how easy it is to install and use Fooocus.
Just so you know, I usually only use the SAI Photographic style when doing portraits of people. It seems to give me the best results when it comes to getting the eyes to look authentic. If you really want to get fancy, you can toss in the Fooocus Masterpiece style along side it to get results with better eyes and an emphasis on smoother skin tones. In my opinion, it looks a bit less authentic but still very impressive results. It will often times add earrings, makeup and glam for woman which I find a bit intrusive. Here are a couple examples and you can clearly see the emphasis in the eyes and lips.


Notice how it added what looks like eye liner and cosmetic additions to the eyes? Don't get me wrong, it still looks absolutely sunning. However, I feel it's more authentic when those elements are left out.
Subscribe to me on YouTube! I just started my channel over there and would love to have you subscribe if you like my content!
Closing Thoughts
I recently got a new GTX 3060ti, but surprisingly, it takes almost twice as long for AI image generation tasks. It's a bit unexpected since it's a newer model card than the 2080 and has 12GB of VRAM, but apparently, that doesn't make much difference in this case. It turns out the key factor is the number of tensor cores in the GPU, and the 3060ti only has 112, which is on the lower end. So, if you're looking for a GPU mainly for AI purposes, remember to check the tensor core count.
Currently, the 4090 is top dog but for a hefty price tag! Oh how I'd love to get my hands on one of those puppies for a play with AI image generation. It's tempting to get one but I am getting great results with my 2080! Not only that but I can think of a few other things to spend $2,800 on. 😁