Generate AI Images Blazing Fast using SDXL Turbo and Fooocus
Create AI images quickly with the latest SDXL Turbo technology. I'll show you how to use DreamShaper, a favorite of mine, with Fooocus.


Get ready to explore the swift and efficient world of AI image creation! Today, we're highlighting the latest innovation in AI technology, the SDXL Turbo. This groundbreaking tool is changing the game in AI image generation, offering speed and user-friendliness like never before.
What is SDXL Turbo?
Stability AI has launched SDXL Turbo, a significant leap forward in text-to-image synthesis, powered by a novel distillation technique called Adversarial Diffusion Distillation (ADD). This breakthrough allows the model to quickly produce high-quality images, transforming the way we approach real-time text-to-image conversion.
What Model to Use?
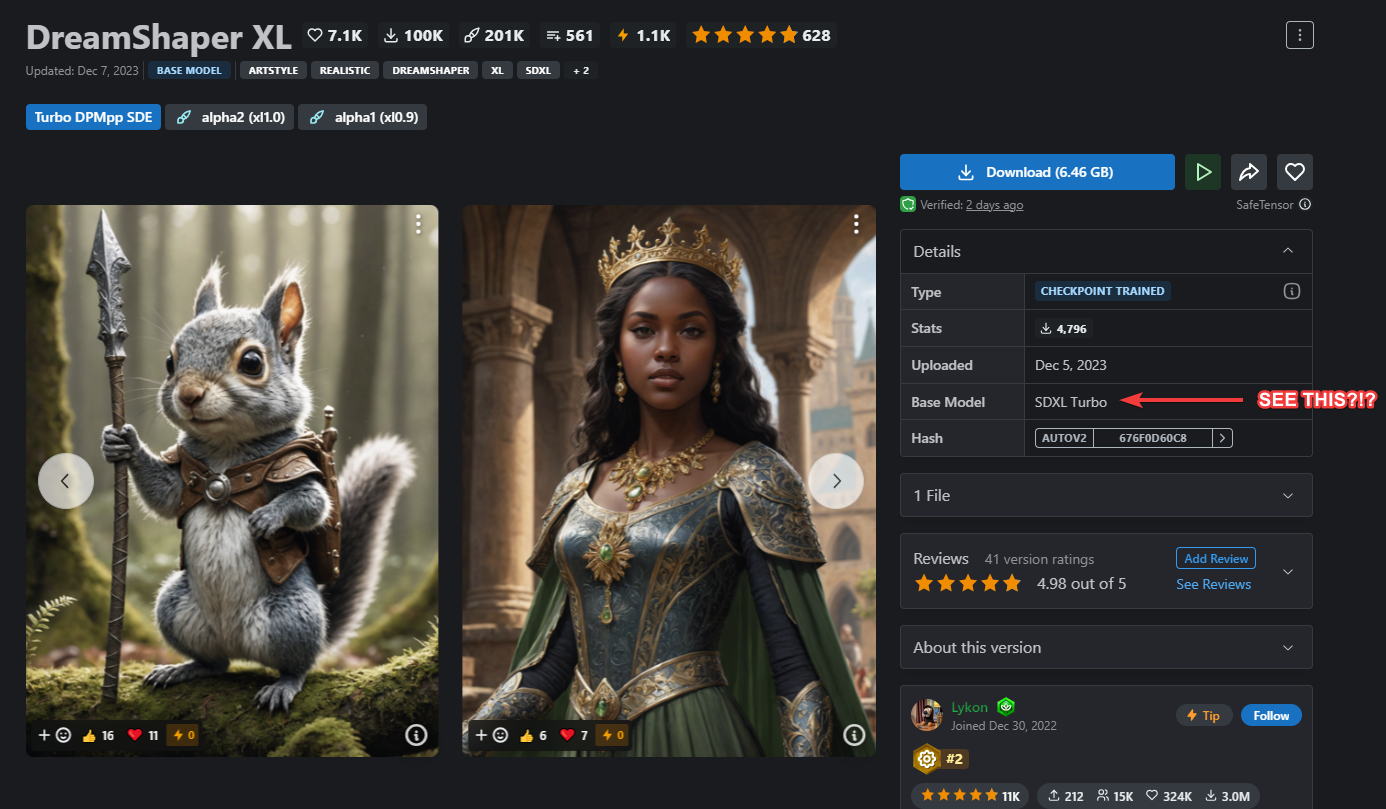
In this demo, I'm going to use the latest DreamShaper XL Turbo model. This model is just the beginning, showing off a variety of styles using the same Turbo setup. The speed of creating an image depends on how many steps you take. A turbo/lcm model can do in 5 steps what a regular model does in 30, without losing quality. The time for each step is the same, but you need fewer steps.
What Platform to Use?
In this demo, I'll be working with the one and only Fooocus to run the model and create the images. I'll guide you through the settings I use to get DreamShaper XL Turbo up and running in Fooocus. Currently, Fooocus only supports SDXL models.
Assuming you already have Fooocus installed on your system, the first thing you need to do is get the DreamShaper XL Turbo model. You can download it here from the CivitAI website.
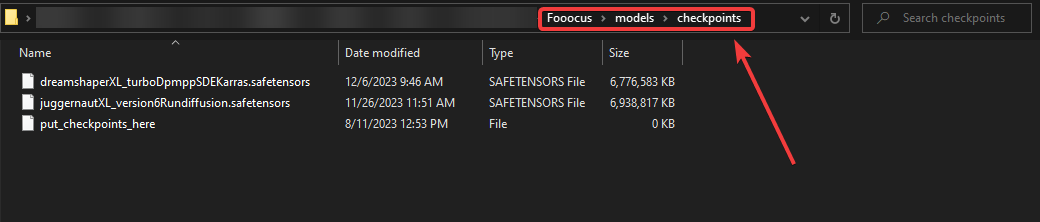
Once you download the model, place it in the Fooocus > models > checkpoints folder.
Now run Fooocus and select the model from the dropdown menu.
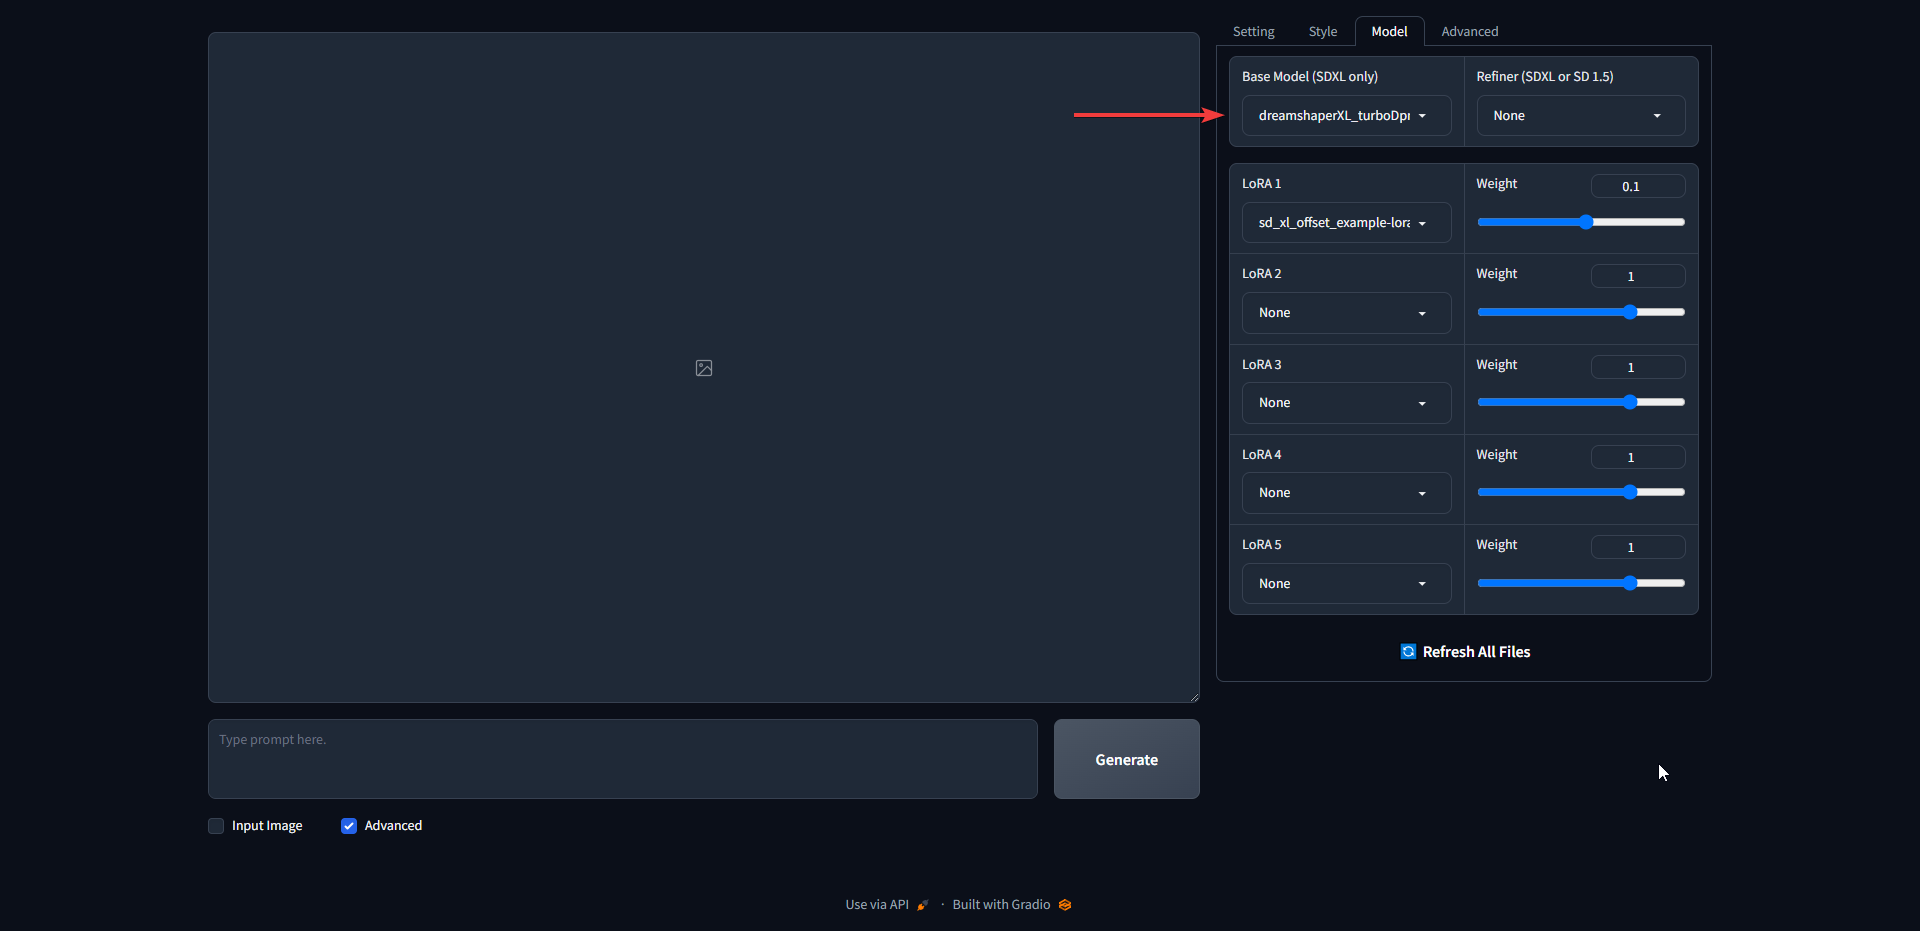
Be sure to change LoRa 1 to none. Make sure there's no refiner selected.
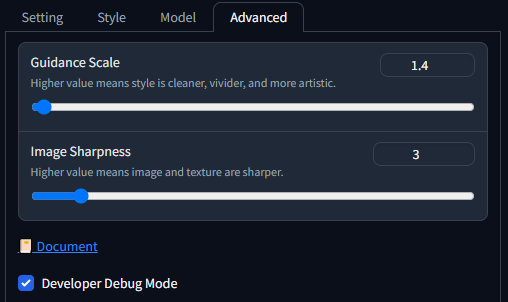
On the Advanced tab we need to make a few changes. Set the Guidance Scale to 1.4 and the Image Sharpness to 3. Make sure "Developer Debug Mode" is ticked.
Under the Debug Tools tab there are only 2 things you need to change. The Sampler to dpmpp_sde and the Forced Overwrite of Sampling Step to 6.
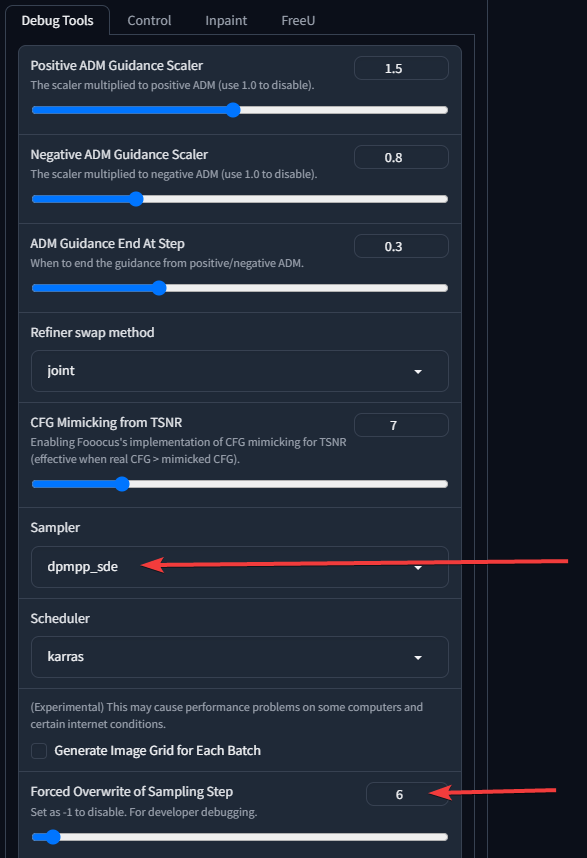
This will basically activate turbo by allowing the model we selected to create your images in only 6 steps!
After changing these settings, you can now choose a style and create an image. I chose the SAI Photographic setting. I use the prompt "a bird on a branch" and "A man in a mech suit. Face shield lifted. Dark and dingy. Extreme detail. 8k resolution" and got these amazing results in only 6 steps.
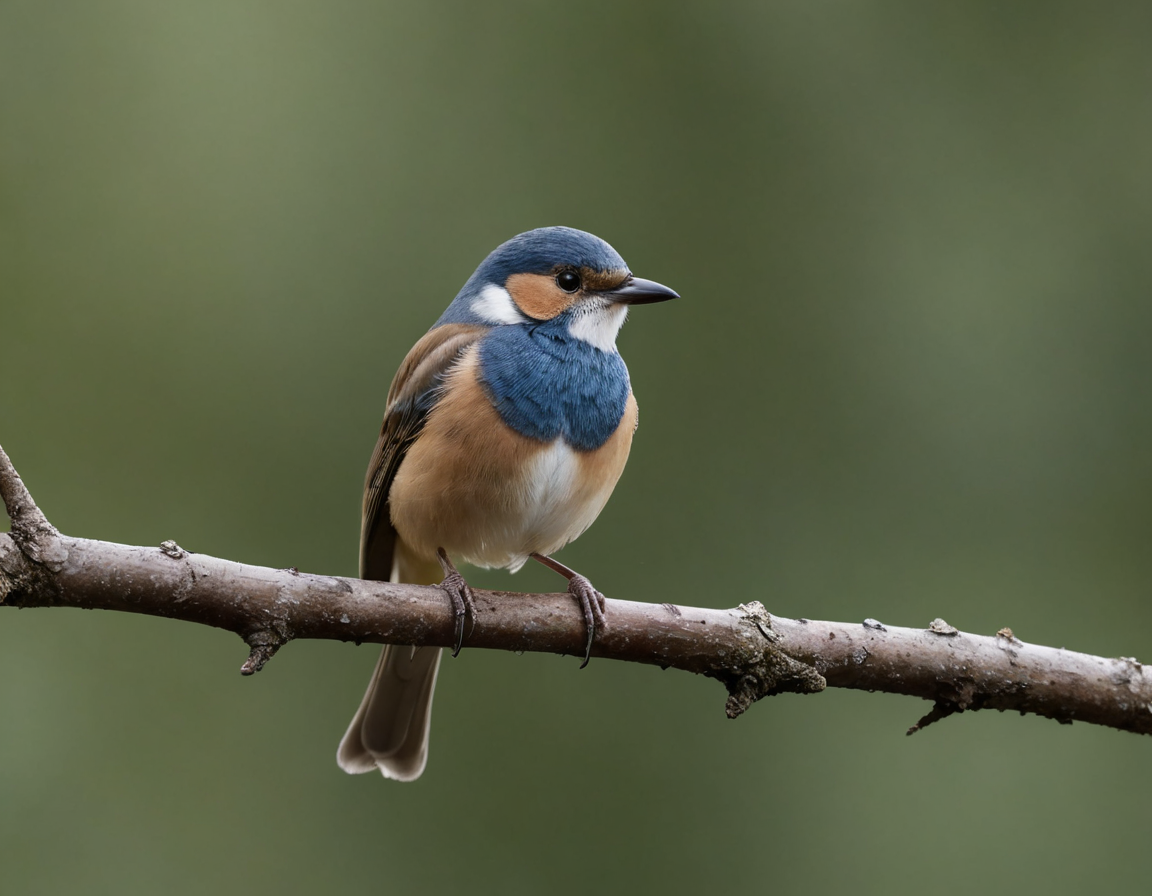
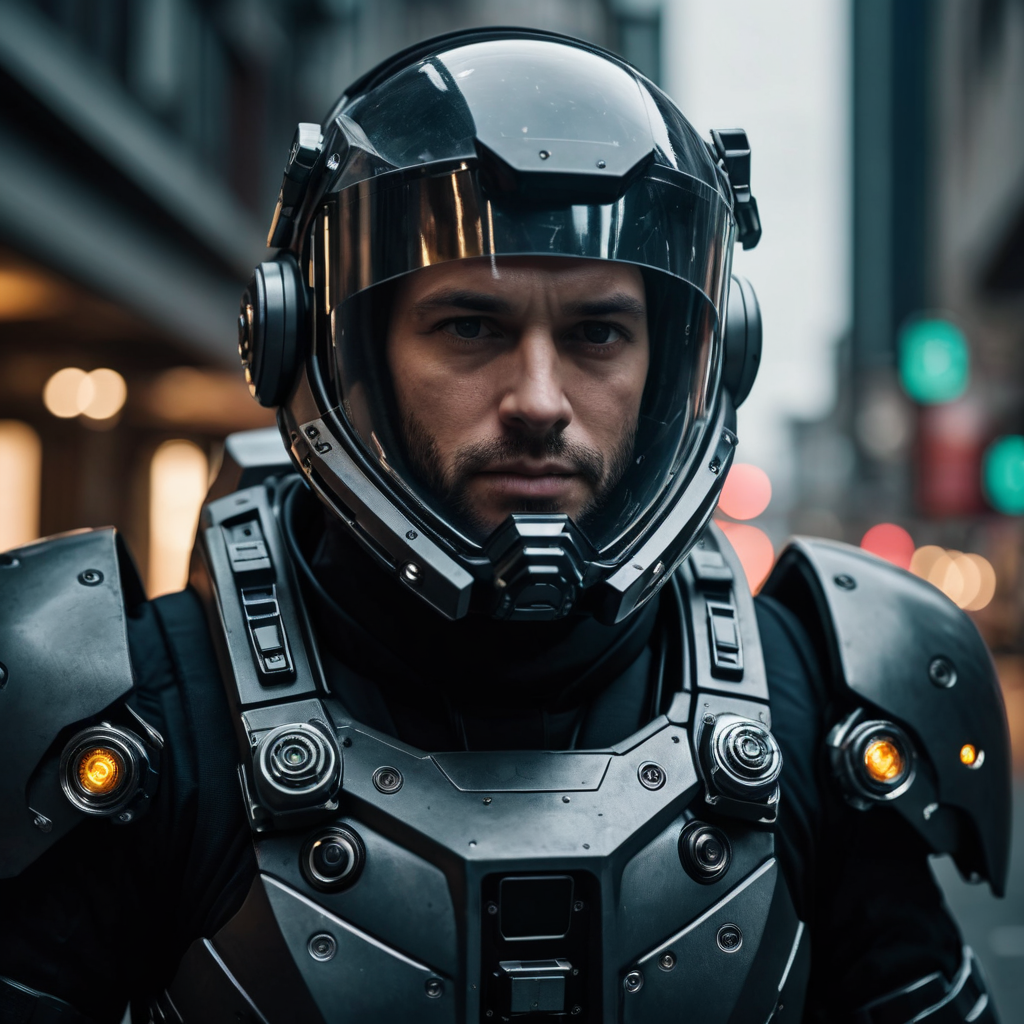
Those are incredible results, achieved in only 6 steps! This advancement is especially beneficial for people with lower-end GPUs. The amount of time you'll save is substantial, making it feel as if you've given your GPU a major upgrade. This efficiency not only speeds up your workflow but also opens up new possibilities for image creation, even on less powerful GPUs.
Take a look at my extended collection of Fooocus model studies on this page. It includes a variety of image sets, detailed prompts, and the specific settings I used for each one. It's a great resource for anyone interested in exploring the capabilities and creative possibilities of the Fooocus app.
Check me out on YouTube! I create videos related to AI image generation like this one.
What are your thoughts on the speed and quality? Let us know in the comments below and join us on Discord!